Your Complete Guide to Planning a Travel Itinerary for Visa Applications
Look, I get it. Planning a trip abroad is exciting until you hit that wall of visa paperwork. Then suddenly you're drowning in embassy requirements, flight reservations you haven't booked yet, and accommodation bookings that cost a fortune before you even know if your visa will be approved. Sound familiar?
Here's the thing though - your travel itinerary isn't just some bureaucratic box to tick. It's actually the backbone of your entire visa application. Visa officials use it to figure out if your travel plans make sense, whether you're financially prepared, and most importantly, if you're actually planning to come back home.
This guide is specifically about building that itinerary — the actual day-by-day document, how to structure it, and the logistics of pulling it together. If you're looking for which visa type to apply for, what documents to gather, or the most common mistakes that sink applications, we've got separate guides for all of that and I'll point you to them as we go instead of repeating them here.
Why Your Travel Itinerary Matters More Than You Think
Visa officials aren't trying to make your life difficult (even though it might feel that way sometimes). They're just doing their job - making sure every visitor has legitimate travel plans and won't overstay their welcome. Your itinerary tells them everything they need to know about your trip in one document.
Think about it from their side. They see hundreds of applications a week. Some people submit a napkin sketch of their trip. Others submit a 50-page manifesto with every museum color-coded by day. Neither works particularly well. What they actually want is straightforward: proof you've thought the trip through, know where you're staying, know how you're getting around, and have a ticket home.
What Goes Into an Embassy-Approved Itinerary
Start with the basics. Your personal information needs to match your passport exactly - I mean exactly. If your passport says "Alexander" but you go by "Alex" on your itinerary, that's going to raise questions you don't want to answer at your interview.
Include your full legal name, passport number, nationality, and date of birth. Most countries also want your passport valid for at least six months beyond your arrival date, so check that before you plan anything else — there's no point building a beautiful itinerary around a passport that's about to expire.
Mapping Out Your Actual Route
Beyond the flight and hotel confirmations themselves (more on getting those without financial risk in a second), consulates want to see your day-to-day plan. Not every minute scheduled like a state visit — just a reasonable outline of where you'll be and what you'll be doing.
For a Schengen visa specifically, this part determines which embassy you even apply to. Five days in France and two in Germany means you apply at the French embassy. Flip that ratio, and you're headed to the German one instead.
List each city, how many days you'll spend there, and roughly what you're doing. Include the transportation between them too — train schedules, bus bookings, car rentals, whatever's getting you from one to the next. Taking the train from Paris to Berlin? Note the operator, departure time, and booking reference.
The visa type shapes what your day plan should emphasize. Tourist visas want sightseeing and restaurant detail. Business visas should center on meetings, conference schedules, and company visits rather than leisure. Medical visas need hospital appointments and consultation dates. (For the full rundown of visa-type mistakes — applying under the wrong category entirely — see our visa application mistakes guide.)
Requirements do vary quite a bit by destination — Schengen is the most itinerary-detailed of the bunch, with exact entry/exit dates and no accommodation gaps allowed. If you want the full breakdown of how to get a Schengen visa specifically, that's covered start to finish in our Schengen visa guide — this page stays focused on the itinerary document itself rather than re-explaining every country's rules.
Special Considerations for Minors and Groups
Traveling with kids adds another layer. Children under 16 typically get five-year passports instead of the standard ten, and if they're traveling without both parents, you'll need a notarized consent letter — something like: "I acknowledge that my son/daughter is traveling outside the country with [adult's name] with my permission." Get it notarized. It saves you a headache at the border that isn't worth risking.
Divorced parents need custody agreements or proof of sole custody in the itinerary packet. It sounds excessive, but it exists to prevent exactly the kind of international custody dispute you'd expect.
Group travel can actually simplify things. U.S. citizen children under 19 traveling to Canada or Mexico with school groups, religious organizations, or sports teams can sometimes use birth certificates instead of passports, provided the supervising organization provides a letter on official letterhead with group and per-child details.

Getting Your Flight and Hotel Details Without the Financial Risk
You need flight and hotel details in your itinerary, but you also don't want to prepay for two weeks at a hotel — or buy a ticket outright — before you know if you're approved. That's a real tension, and it's the whole reason verifiable reservation services exist: temporary bookings with real, checkable references that don't require full payment upfront.
We've written the full explanation of how these work, what "dummy ticket" actually means versus a real reservation, and how to tell a legitimate service from a sketchy one in our flight itinerary vs. booking vs. reservation guide — worth a read if you're unclear on the terminology. The short version for itinerary-building purposes: your flight entry needs the airline, booking reference, departure/arrival times, airport codes, and any layovers (give yourself at least 2-3 hours on a layover — a 45-minute connection between international flights makes your whole itinerary look unrealistic to whoever's reviewing it). Your accommodation entry needs the property name, address, contact info, and check-in/check-out dates with zero gaps across your stay.
If you want to skip the DIY route entirely, Get Itinerary generates QR-verified flight and hotel documentation from $15, built specifically for this — you plug in your dates, and it handles the formatting embassies expect.

How to Write an Itinerary That Embassy Officials Actually Like
Forget what you've seen online about color-coded spreadsheets with every meal planned down to the minute. Embassy officials don't want that. They want something clear, realistic, and consistent.
Start with a clean document in Word or Google Docs. Put your name and travel dates at the top with a title like "Travel Itinerary for Schengen Visa Application." Then lay out each day in a consistent format:
Day 1 (June 15, 2025) - Paris
-
Arrive CDG Airport at 2:30 PM
-
Check in to Hotel Le Marais (123 Rue Example, 75003 Paris)
-
Evening: Walk around Marais district
-
Dinner: Local restaurant near hotel
Day 2 (June 16, 2025) - Paris
-
Morning: Visit Louvre Museum
-
Afternoon: Lunch in Latin Quarter, Notre Dame area
-
Evening: Eiffel Tower sunset viewing
Keep it natural — you're a person planning a vacation, not executing a military operation. Officials spot an overly complex or physically impossible itinerary immediately, because they've seen thousands of them.
That's the trap worth watching for specifically: cramming too much into too little time. An itinerary showing the Louvre, Versailles, and the Eiffel Tower in one day, with a three-hour business meeting also somehow fitting in, tells the reviewer you're either padding the trip or you haven't actually thought it through. Keep daily plans realistic, factor in travel time between locations, and leave room to breathe. Nobody's itinerary should run 7 AM to midnight every single day.
Making Sure Everything Lines Up
Every document in your application needs to tell the same story. If your bank statement shows $3,000 and your itinerary has first-class flights and five-star hotels across Europe for three weeks, that math doesn't work — and officials will notice.
Your employment letter should confirm the same dates as your itinerary. Your accommodation should cover every night with no unexplained gap. Flight dates should match hotel dates should match your stated purpose. One date off by a single day can be enough to trigger a second look. Officials deal with inconsistent or fraudulent applications constantly, so they're trained to catch exactly this kind of thing — it's worth a dedicated pass through your whole application just checking dates against each other before you submit.
For the deeper list of specific mistakes that trip up itineraries — mismatched dates, accommodation gaps, vague activity descriptions, region-specific Schengen/ASEAN/Middle East requirements — that's the focus of our itinerary mistakes guide rather than something to re-cover here.
Using Verifiable Itinerary Services the Right Way
If you do go the verifiable-reservation route rather than building everything yourself, a couple of things are worth knowing. Most visa offices explicitly accept these because they understand the financial risk of booking real tickets before approval — you're not cutting corners, you're working within a system embassies are already familiar with.
If it comes up in an interview (rare, but it happens), be straightforward about it: the reservations are for the visa application, and you'll book the real thing once approved. Officials generally read that as financially sensible, not evasive.
One practical note if your timeline slips: most verifiable-reservation services, ours included, allow revisions if your dates change or processing runs long — worth confirming before you commit to one, since airline-side holds typically expire in 24-72 hours and won't survive a slow-moving application.
Making Solo Travel Work With Your Itinerary
Solo applications get scrutinized more closely, especially for younger travelers, certain destinations, or a first international trip. That's frustrating, but it's manageable — plenty of solo travelers get approved every year, and the fix is mostly about your itinerary being more detailed, not less.
List actual hostels or hotels with real booking confirmations rather than "will figure it out." Include organized tours or day trips you've booked — it shows structure and gives officials another verification point, and it's genuinely useful once you're actually traveling too. Show a comfortable financial cushion; solo travelers sometimes get asked to demonstrate a higher daily budget than someone splitting costs with a travel companion would.
If you're a woman traveling solo, some countries are unfortunately more skeptical by default. Being extra thorough — daytime-heavy activities, accommodation in well-known neighborhoods, any travel communities or groups you're connected with — helps counter that bias in the review, even though it's an annoying extra step that shouldn't be necessary.
What to Do If Your Plans Change
Life happens. Visa processing takes longer than expected, or you realize you can't get time off work when you thought you could. Don't panic.
If you're using verifiable itinerary services, most allow unlimited revisions. You can adjust dates, change destinations, or modify passenger details without extra charges. This flexibility is one of the main advantages over actual bookings, where change fees can cost hundreds of dollars.
If your visa is taking longer than expected, check if your temporary reservations are still active. Some services automatically extend them, while others might need you to request a refresh.
Best Travel Apps to Plan Trips and Stay Organized
Planning a visa trip means juggling a lot of moving pieces. Thankfully, we live in an era where travel apps can make your life significantly easier. The right apps help you plan trips efficiently while keeping all your required documents and confirmation emails in one place.
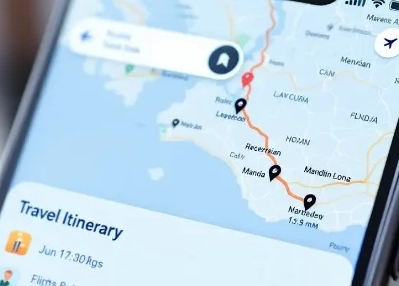
Google Maps is close to essential — beyond navigation, use it to check attraction and consulate opening hours, save your accommodation location, and estimate travel time between the things on your day plan. Mark every stop from your itinerary and you've got a visual sanity check on whether your schedule is actually realistic.
TripIt turns your confirmation emails into a day-by-day master itinerary automatically — forward your bookings and it assembles the schedule for you, which is a fast way to catch a date mismatch before an officer does.
Wanderlog works well if you're planning with someone else — shared map, drag-and-drop reordering based on opening hours and travel time, and a place to attach your booking confirmations directly to each stop.
PackPoint creates customized packing lists based on your destination, trip length, and planned activities. As a visa applicant, you're probably already thinking about required documents, but this ensures you don't forget the practical stuff like adapters or weather-appropriate clothing.
For solo travel, Meetup and Couchsurfing apps connect you with other travellers and locals. While these won't help with your visa directly, they provide detailed information about destinations and can enhance your understanding of local customs - something visa officials appreciate seeing in your planning.
The key is finding a balance. Pick two, maybe three tools that cover different jobs — planning, navigation, document storage — rather than piling on every travel app that exists. More apps just means more places to lose track of the one document that actually matters.
Putting the Itinerary Together
- Settle on your travel dates and destinations.
- Confirm the itinerary-specific requirements for your destination (Schengen's entry/exit and no-gap rules are the strictest — see the Schengen guide if that's you).
- Build your day-by-day schedule in the consistent format above.
- Get verifiable flight documentation — here's how.
- Get accommodation documentation covering every night with no gaps.
- Map out transportation between cities if you're visiting more than one.
- Cross-check every date against your other application documents.
- Double-check the whole thing reads like a real trip a real person would take.
That's it. The goal was never to impress anyone with organizational skill — it's showing a reviewer that you've got a legitimate, realistic plan and somewhere to come back to when it's over.
Ready to get your flight or hotel documentation sorted? Start with flight reservations or hotel reservations — both without the financial risk of booking before you're approved.